You're My Kind of Fancy
Welcome to the Candy Hearts Blog Hop for April! Today we are sharing projects with Fancy Folds. After reading my post, I hope you will hop to the next person on the list below. Be sure to hop around to see ALL the great projects the Candy Hearts have created for you!
Who doesn't love all those fancy fun fold cards? I know I love them, however they can be a little intimidating. I found this easy Triple Fold Fancy card that Connie Stewart @ Simply Simple Stamping did on a YouTube video. I really had fun doing this one and will probably do more in the future. There are so many possibilities.
Supplies used: All items used are current Stampin' Up! products.
- Hello LadyBug Stamp Set (157693)
- LadyBug Builder Punch (157698)
- Matte Black Dots (154284)
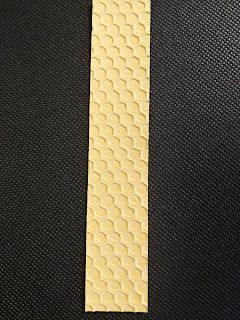
- Hive 3D Embossing Folder (157955)
- Vellum Cardstock (101856)
- Perfectly Penciled 12 x 12 Designer Series Paper (159244)
- Basic White Cardstock (159276)
- So Saffron Cardstock (105118)
- Basic Black Cardstock (121045)
- Daffodil Delight Cardstock (119683)
- Daffodil Delight Ink Pad (126944)
- Crumb Cake Ink Pad (147116)
- Blending Brush (153611)
- Memento Tuxedo Black Ink (132708)
- Wink Of Stella Clear Glitter Brush (141897)
Here’s How I made it!
Cut:
- Basic White Cardstock - 8 1/2 x 11 cut to 5 1/2 x 11
- Basic White Cardstock - 1 1/4 x 10
- So Saffron - 2 pieces 1 x 5 1/4
- So Saffron - 1 x 10
- Daffodil Delight Cardstock - 3 strips 1/4 wide (for the bee stripes)
- Perfectly Penciled DSP - 4 x 5 1/4
- Perfectly Penciled DSP - 1 1/2 x 5 1/4
Punch :
- Basic Black using the LadyBug Punch - 2 bodies
- Vellum using the LadyBug Punch - 2 wings
Embossing:
- The two pieces of So Saffron that measures 1 x 5 1/4, the So Saffron that measures 1 x 10, these pieces are embossed using the Hive 3D Embossing folder. When embossing the longer piece that measures 1 x 10, this will need to be embossed on both ends to get the whole piece embossed.
Assembling the Bee:
- Using the 3 strips of Daffodil Delight Cardstock that measures 1/4 wide. Glue 3 pieces to each LadyBug body to make the Bee. Take the Vellum wing, color with the Wink of Stella to give a little sparkle, once done, glue down where the first strip starts. Place a Matte Black Dot where the wing comes together.
- Using Crumb Cake Ink Pad and Blender brush, on the 3 pieces of embossed So Saffron Cardstock, gently ink around the edges. It wont be dark but just enough to give some color.
Assemble the Card:
- Take the Basic White Cardstock base, cut at 5 1/2 x 11 Score at 1 1/4, 5 1/2, 9 1/4. Fold in half, then fold the other scores toward the right side.
- The 2 embossed strips that measure 1 x 5 1/4, glue them on the outside and inside of the fold that measures 1 1/4.
- The DSP that measures 1 1/2 x 5 1/4 glue on the outside of the fold that was scored at 9 1/4. When folded together it will look like the picture below.
- Adhere the DSP that measures 4 x 5 1/4 on the blank page just under the folds.
- Take the Basic White Cardstock that measures 1 1/4 x 10. adhere the So Saffron Embossed piece that measures 1 x 10 together. Once dried, wrap the band around your card. Burnish the sides that fold around the card. Glue together.
- Using the Hello LadyBug Stamp set, ink the 3 flower stamp with Daffodil Delight ink, and the sentiment in Memento Ink. Place a LadyBug right above the sentiment. Also place the other LadyBug on the band to cover up the ends that were adhered together.
Wasn't this a fun easy card. I just love how this turned out. And did I tell you that I love those Bees!! I cant wait to use this fun fold again for a super easy card. I hope you enjoyed playing with this set and get inspired to use this fold in your next project.


I love the bees made from the ladybug punch on your pretty card. Enjoy your day!
ReplyDeleteSuch a great fold on this card! I love the mix of yellow and black - and these patterns are great together. ♥
ReplyDeleteGreat fold, great colors, great mix of patterns, and those bees are fantastic!
ReplyDelete